When 802.1Q trunking carries traffic between switches, it tags Ethernet frames with a VLAN identifier so the receiving switch knows which VLAN that traffic belongs to. But there’s one special exception to this tagging rule — and that exception is the native VLAN.
Understanding the native VLAN is something every CCNA candidate needs to get right, both for the exam and for real-world switch configuration.
What Is the Native VLAN?
The native VLAN is the one VLAN on an 802.1Q trunk that travels across the link without a tag. Frames belonging to the native VLAN look identical to standard untagged Ethernet frames — there’s no 802.1Q header added. If you were to capture this traffic with a packet analyzer, it would appear as a completely ordinary Ethernet frame.
When a Cisco switch receives an untagged frame on a trunk interface, it doesn’t discard it — it assumes the frame belongs to the native VLAN and processes it accordingly. This is the fundamental rule: untagged traffic on a trunk = native VLAN traffic.
Because of how this works, both switches on either end of a trunk link must agree on which VLAN is the native VLAN. If they disagree, you’ll get a native VLAN mismatch — traffic gets assigned to the wrong VLAN on the receiving end, and Spanning Tree will flag the inconsistency with a log warning.
By default on Cisco switches, VLAN 1 is the native VLAN.
Lab Topology
To see the native VLAN in action, consider two Cisco switches connected back to back:
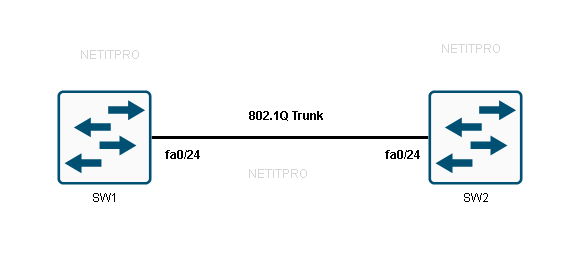
Both switches are connected via FastEthernet 0/24. The goal is to configure an 802.1Q trunk between them and then examine how the native VLAN behaves.
Configuring the 802.1Q Trunk
On each switch, move into the interface and set the encapsulation to dot1q before enabling trunk mode:
SW1 Configuration:
SW1(config)#interface FastEthernet 0/24
SW1(config-if)#switchport trunk encapsulation dot1q
SW1(config-if)#switchport mode trunk
SW2 Configuration:
SW2(config)#interface FastEthernet 0/24
SW2(config-if)#switchport trunk encapsulation dot1q
SW2(config-if)#switchport mode trunk
The switchport trunk encapsulation dot1q command explicitly tells the switch to use 802.1Q as the trunking protocol. On some newer Cisco switch models, this line isn’t required because dot1q is the only option — but on older platforms that also support ISL, you need to be explicit.
Related: “Configure trunk ports on cisco switches“
Once trunk mode is set, the switches negotiate the trunk and start passing VLAN traffic. If you’re working in an environment where trunks are being negotiated automatically, it’s worth understanding how “Dynamic Trunking Protocol” controls this negotiation process.
Verifying the Trunk and Native VLAN
Use show interfaces trunk to confirm the trunk is up and to check the current native VLAN:
SW1 output:
SW1#show interfaces fastEthernet 0/24 trunk

Port        Mode         Encapsulation  Status        Native vlan
Fa0/24      on           802.1q         trunking      1

Port        Vlans allowed on trunk
Fa0/24      1-4094

Port        Vlans allowed and active in management domain
Fa0/24      1,10,12-13,20,23,34,100,123

Port        Vlans in spanning tree forwarding state and not pruned
Fa0/24      1,10,12-13,20,23,34,100,123
SW2 output:
SW2#show interfaces fastEthernet 0/24 trunk

Port        Mode         Encapsulation  Status        Native vlan
Fa0/24      on           802.1q         trunking      1

Port        Vlans allowed on trunk
Fa0/24      1-4094

Port        Vlans allowed and active in management domain
Fa0/24      1,10,12-13,20,23-24,30

Port        Vlans in spanning tree forwarding state and not pruned
Fa0/24      1,10,12-13,20,23-24,30
Breaking down this output:
- Mode: on — the trunk has been statically set, not negotiated
- Encapsulation: 802.1q — dot1q is in use
- Status: trunking — the link is active as a trunk
- Native vlan: 1 — VLAN 1 is the current native VLAN
The third and fourth sections of the output show which VLANs are actually passing traffic. Notice that SW1 and SW2 have slightly different active VLANs — this is normal, as each switch only forwards traffic for VLANs that exist in its local database.
What Actually Travels on the Native VLAN?
A natural question is: what kind of traffic actually uses the native VLAN? A packet capture on the trunk link reveals the answer — Cisco management protocols like CDP (Cisco Discovery Protocol) send their frames untagged on the native VLAN.
Here’s what a captured frame looks like:
Frame 1: 606 bytes on wire
IEEE 802.3 Ethernet
  Destination: CDP/VTP/DTP/PAgP/UDLD (01:00:0c:cc:cc:cc)
  Source: Cisco_0b:36:1a (00:11:bb:0b:36:1a)
  Length: 592
Logical-Link Control
Cisco Discovery Protocol
Notice there’s no 802.1Q tag in this frame at all. It’s a plain IEEE 802.3 Ethernet frame carrying a CDP message. This confirms that CDP — along with VTP, DTP, and other Cisco control-plane protocols — runs natively on VLAN 1 by default.
This has an important security implication. Because management protocols run on VLAN 1, leaving VLAN 1 as the native VLAN means that untagged management traffic is accessible to anyone connected to VLAN 1, including potentially unauthorized users on access ports in that VLAN.
Changing the Native VLAN
Changing the native VLAN to something other than VLAN 1 is a recommended security practice. The logic is simple: if the native VLAN is a VLAN that has no real user traffic on it, it becomes much harder to exploit. This also helps protect against a technique called VLAN hopping, where an attacker abuses the native VLAN to send traffic into other VLANs.
To change the native VLAN, apply this command on the trunk interface of both switches:
SW1:
SW1(config)#interface FastEthernet 0/24
SW1(config-if)#switchport trunk native vlan 10
SW2:
SW2(config)#interface FastEthernet 0/24
SW2(config-if)#switchport trunk native vlan 10
Now verify the change:
SW1:
SW1#show interfaces fastEthernet 0/24 trunk

Port        Mode         Encapsulation  Status        Native vlan
Fa0/24      on           802.1q         trunking      10
SW2:
SW2#show interfaces fastEthernet 0/24 trunk

Port        Mode         Encapsulation  Status        Native vlan
Fa0/24      on           802.1q         trunking      10
VLAN 10 is now the native VLAN on both sides. The key thing to remember here is that this change must be made on both switches simultaneously. If SW1 is using VLAN 10 as the native VLAN but SW2 is still using VLAN 1, Spanning Tree Protocol will detect the mismatch and generate a warning — and more importantly, untagged frames will be misassigned to the wrong VLAN on the receiving switch.
Tagging the Native VLAN
There’s an optional step that takes native VLAN security one step further: you can instruct the switch to tag native VLAN traffic just like any other VLAN. This effectively removes the concept of an “untagged” VLAN on the trunk entirely.
Apply this command globally on both switches:
SW1(config)#vlan dot1q tag native
SW2(config)#vlan dot1q tag native
With this command in place, the switch adds an 802.1Q tag to native VLAN frames before sending them out the trunk. The receiving switch then reads that tag just like any other VLAN. This prevents VLAN hopping attacks that rely on the untagged nature of native VLAN traffic, and it’s considered best practice in security-conscious environments.
One thing to be aware of: if you enable vlan dot1q tag native on one switch but not the other, you’ll create a mismatch where one side sends tagged native VLAN frames and the other expects them to be untagged. Make sure both sides match.
Summary
The native VLAN is a fundamental part of how 802.1Q trunking works on Cisco switches. Every trunk link has one, and traffic for that VLAN travels across the link without a tag. By default, VLAN 1 fills this role — but that’s also the VLAN that carries management protocols like CDP and VTP, which is why changing it is a standard security recommendation.
The key configuration points to remember:
- VLAN 1 is the default native VLAN on Cisco switches
- Use
switchport trunk native vlan <id>to change it on a per-interface basis - Both sides of a trunk must use the same native VLAN
- Use
vlan dot1q tag nativeglobally to force tagging of native VLAN frames and eliminate untagged traffic on the trunk entirely
Getting the native VLAN right is essential both for exam questions and for building well-secured switch infrastructure in production environments.