Managing VLANs across a large network is one of those tasks that sounds simple until you’re sitting in front of 20 switches and realize every VLAN needs to be created on every single one of them. That’s where VTP — the VLAN Trunking Protocol — comes in. VTP allows you to create, modify, or delete VLANs on one switch and have every other switch in your network automatically update itself. Less manual work, fewer configuration mistakes.
Understanding how VTP operates is important both for real-world switching environments and for the CCNA 200-301 exam.
What VTP Does
At its core, VTP is a Cisco proprietary protocol that synchronizes VLAN information across switches. Instead of logging into each switch individually to add a new VLAN, you configure it once on the designated switch, and VTP handles the rest.
The way it tracks changes is through a revision number. Every time you add, rename, or delete a VLAN, this number increases by one. Switches in the network compare revision numbers — the higher number wins, and everyone synchronizes to match it.
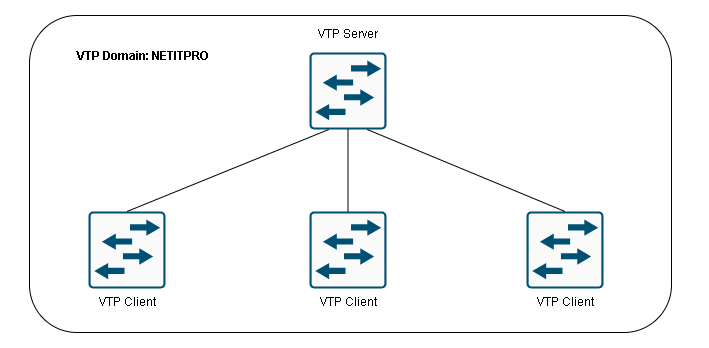
To get VTP working, all participating switches must share the same VTP domain name. You can choose any name you like, but it must be identical across all switches. Think of it as a group identifier — switches only accept VTP updates from others in the same domain.
Here’s the basic flow:
- A VLAN is created, modified, or deleted on the VTP server.
- The revision number increments.
- An advertisement is sent out to all connected switches.
- Other switches receive the advertisement and update their VLAN databases.
VTP Modes
Every switch in a VTP environment operates in one of three modes: Server, Client, or Transparent. Each behaves differently when it comes to receiving updates, making changes, and passing information along.
VTP Server
This is the default mode on Cisco switches. A VTP server is the switch where you create and manage VLANs. It sends advertisements to other switches and synchronizes itself with the highest revision number it sees — which is a detail worth remembering, as we’ll discuss shortly.
VTP Client
A VTP client cannot create, modify, or delete VLANs. It receives advertisements from the server, updates its own VLAN database, and forwards those advertisements to downstream switches. It’s essentially a read-only participant — useful for switches that don’t need to originate VLAN changes.
If you try to create a VLAN on a client switch, IOS will stop you immediately:
SW2(config)#vlan 50
%VTP VLAN configuration not allowed when device is in CLIENT mode.
VTP Transparent
Transparent mode is the interesting one. A transparent switch does not synchronize its VLAN database with the VTP domain. However, it will forward VTP advertisements it receives to other switches — it just doesn’t apply them to itself.
The benefit of transparent mode is that you can create VLANs locally on that switch without them propagating to the rest of the network. Those VLANs exist only on that switch and won’t show up anywhere else.
Here’s a side-by-side comparison of all three modes:
| VTP Server | VTP Client | VTP Transparent | |
|---|---|---|---|
| Create / Modify / Delete VLANs | Yes | No | Local only |
| Synchronizes itself | Yes | Yes | No |
| Forwards advertisements | Yes | Yes | Yes |
The VTP Security Risk
VTP sounds convenient, but there’s a well-known and serious risk built into how it works. Since both servers and clients synchronize to whichever switch has the highest revision number, the following scenario can bring down your entire network’s VLAN configuration:
Imagine you have a stable production network with a VTP server and several client switches. One day you pull one of those client switches out of the network to do some lab testing. In the lab, you change it to VTP server mode and start creating and deleting VLANs — each change bumps the revision number. Eventually you delete all your test VLANs, set it back to client mode, and plug it back into production.
The problem? That switch now has a higher revision number than every other switch in your network. The other switches see a newer advertisement and synchronize to it — wiping out all the VLANs you had configured in production. Your ports won’t fall back to VLAN 1 automatically either. They just lose their VLAN assignment and stop forwarding traffic.
This is the reason many engineers choose to use VTP version 3 (which adds a primary server concept and better protection) or disable VTP entirely and manage VLANs manually on each switch. The manual approach takes more effort, but it eliminates the revision number risk entirely.
VTP Pruning
There’s one more feature worth understanding before we look at configuration — VTP pruning.
In a typical setup, trunk links carry traffic for all VLANs. If a device in VLAN 10 sends a broadcast, that broadcast gets flooded across every trunk link to every switch, even switches that have no devices in VLAN 10 at all. That’s wasted bandwidth.
VTP pruning solves this by automatically blocking VLAN traffic on trunk links where it isn’t needed. If a switch has no ports assigned to VLAN 10, VTP pruning removes VLAN 10 traffic from the trunk feeding that switch. The result is cleaner trunks and less unnecessary flooded traffic.
Pruning applies only to VLANs 2–1001 by default. VLAN 1 is never pruned. Whether pruning is on or off by default depends on your switch model — you can check with show vtp status.
If you want a deeper look at how trunk links work and how VLAN traffic is tagged, see “Configure trunk ports non cisco switches“.
VTP Configuration Walkthrough
Let’s walk through a practical configuration using three switches. Before starting, the VLAN databases and startup configurations were cleared on all three. Initially, all switches default to VTP Server mode with no domain name set.
Checking Initial VTP Status
SW1#show vtp status
VTP Version                     : running VTP1 (VTP2 capable)
Configuration Revision          : 0
Maximum VLANs supported locally : 1005
Number of existing VLANs        : 5
VTP Operating Mode              : Server
VTP Domain Name                 :
VTP Pruning Mode                : Disabled
VTP V2 Mode                     : Disabled
VTP Traps Generation            : Disabled
MD5 digest                      : 0x57 0xCD 0x40 0x65 0x63 0x59 0x47 0xBD
A few things to note here. The revision number starts at 0, meaning no VLAN changes have been made yet. The operating mode is Server by default. VTP pruning is disabled, and the switch is running VTP version 1 despite being capable of version 2. There’s also no domain name configured — which means VTP synchronization isn’t going to work yet, even if you create VLANs.
Creating a VLAN and Checking the Revision Number
SW1(config)#vlan 10
SW1(config-vlan)#name Printers
SW1#show vtp status
Configuration Revision          : 1
The revision number jumped from 0 to 1. But if you check SW2 and SW3, they still show revision 0. Why? Because no domain name has been configured yet — switches won’t synchronize without one.
Setting the VTP Domain Name
SW1(config)#vtp domain MYNETWORK
Changing VTP domain name from NULL to MYNETWORK
As soon as SW1 sends out a VTP advertisement with this domain name, something interesting happens on the other switches. If a switch receives a VTP packet for a domain it doesn’t belong to, but its own domain is currently empty (NULL), it automatically joins that domain. After joining, it compares its revision number to the incoming one. If the incoming number is higher, it synchronizes.
This means on SW2 and SW3, you would see debug output along these lines:
VTP LOG RUNTIME: Summary packet received in NULL domain state
VTP LOG RUNTIME: Transitioning from NULL to MYNETWORK domain
VTP LOG RUNTIME: Summary packet rev 1 greater than domain MYNETWORK rev 0
Now both switches update their revision to 1 and learn VLAN 10 (“Printers”).
This auto-joining behavior is part of why a switch reconnected to a network can be dangerous — if its domain is NULL, it will join any domain it hears about and then synchronize based on revision numbers.
Creating VLANs from Multiple Servers
Since all three switches start in Server mode, any of them can originate VLAN changes. Creating VLAN 20 on SW2 and VLAN 30 on SW3 will propagate to all switches:
SW2(config)#vlan 20
SW2(config-vlan)#name Servers

SW3(config)#vlan 30
SW3(config-vlan)#name Management
After both changes, every switch shows VLANs 10, 20, and 30 with a revision number of 3.
Switching to Client Mode
SW2(config)#vtp mode client
Setting device to VTP CLIENT mode.
Once SW2 is in client mode, it can no longer create VLANs. It will still learn new VLANs from the server and forward advertisements downstream. To verify, creating VLAN 40 on SW1 propagates through SW2 to SW3, even though SW2 is now a client.
Switching to Transparent Mode
SW2(config)#vtp mode transparent
Setting device to VTP TRANSPARENT mode.
With SW2 in transparent mode and the direct link between SW1 and SW3 disconnected, VTP advertisements from SW1 still reach SW3 — but SW2 itself doesn’t apply them. Creating a local VLAN on SW2 works fine, but that VLAN won’t appear on SW1 or SW3.
This behavior is useful when you want a switch to participate in VLAN forwarding without being subject to domain-wide VLAN synchronization.
How VTP Relates to Trunks
VTP advertisements travel only over trunk links. If a link between two switches is an access port, VTP packets won’t pass through it. This is worth keeping in mind when troubleshooting — if VTP synchronization isn’t working, verify your inter-switch links are actually configured as trunks.
For background on how the OSI model frames this type of Layer 2 behavior, ( “Introduction to the OSI Model“) gives useful context. VTP operates at Layer 2 and relies on the same trunking infrastructure that carries tagged VLAN frames.
On the subject of how frames actually reach the right destinations across these VLANs, (“Understanding Address Resolution Protocol (ARP)“) explains how switches resolve Layer 2 addresses — something that happens inside each VLAN independently.
Summary
VTP simplifies VLAN management in larger switched networks by automatically distributing VLAN information from a central point. The three modes — Server, Client, and Transparent — give you flexibility in how individual switches participate in the domain.
The revision number is the most critical concept to understand. It determines whose VLAN database wins when switches synchronize, and it’s the source of the most common VTP-related disaster in production networks. Always reset a switch’s revision number before connecting it to a live network — this can be done by temporarily changing the VTP domain name to something random, which resets the counter to 0.
VTP pruning adds efficiency by preventing VLAN traffic from flowing over trunks where it has no purpose. VTP can significantly reduce unnecessary broadcast traffic in multi-switch environments.
For the CCNA exam, make sure you can explain the difference between all three VTP modes, describe the revision number risk scenario, and understand why a NULL domain switch will automatically join any VTP domain it encounters.